Tuesday, December 30, 2008

VLC media player

0 comments
VLC media player
VLC (initially VideoLAN Client) is a highly portable multimedia player for various audio and video formats (MPEG-1, MPEG-2, MPEG-4, DivX, mp3, ogg...) as well as DVDs, VCDs, and various streaming protocols. It can also be used as a server to stream in unicast or multicast in IPv4 or IPv6 on a high-bandwidth network.


VLC media player is a free software media player by the VideoLAN project.

It is a highly portable multimedia player, encoder, and streamer supporting many audio and video codecs and file formats as well as DVDs, VCDs, and various streaming protocols. It is able to stream over networks and to transcode multimedia files and save them into various different formats. VLC used to stand for "VideoLan Client", but that meaning is deprecated.

It is one of the most platform-independent players available, with versions for Microsoft Windows, Mac OS X, BeOS, BSD, Windows CE, Linux, and Solaris, and is widely used with over 40 million downloads for version 0.8.6.

VLC uses a large number of free decoding and encoding libraries. Many of its codecs are provided by the libavcodec codec library from the FFmpeg project, but it uses mainly its own muxer and demuxers. It also gained distinction as the first player to support playback of encrypted DVDs on Linux by using the libdvdcss DVD decryption library.

* It is a free cross-platform media player
* It supports a large number of multimedia formats, without the need for additional codecs
* It can also be used as a streaming server, with extended features (video on demand, on the fly transcoding, ...)


Use and feel.............. try to give some comments...


Read full story

Sunday, December 28, 2008

What's USB Pen Drive ?

0 comments
When using PC's and very often while building or upgrading PC's, you'll need to transfer some data between machines. No problem, just throw in a floppy disk, copy all your data onto it and copy it off again at the other PC. Easy.

But is it ever that simple? With the increasing complexity and size of today's applications and file sizes, our old friend the floppy disk just doesn't seem to have the capacity to keep up. At 1.44MB, you're usually going to need to compress your files, and even then you'll need to make sure that the compressed file is less than 1.44MB so it will actually fit.

"No problem!" you say, "I'll get myself a Zip Drive." Fine. With up to 250MB capacity you can store everything you want and more on it. But already those nasty problems have started to creep in. The most significant of those being "Does the other PC have a Zip drive?"

Before long, you've bought two Zip drives and a handful of Zip disks. The overall expense has sky-rocketed in comparison to your old floppy disk system and you still can't take that huge new 'Project' file to work/school because they don't have Zip drives there...


USB Pen Drive is a small keyring-sized device that can be used to easily transfer files between USB-compatible systems. Available in a range of capacities (and in some cases, with an MP3 player built-in) this handy little gizmo can save all those data-transfer hassles.

How do I use it?

Simple. Plug it into the USB port* of your PC (or Mac!) and watch the system automatically detect the new device. Take at look at your system drives... a new drive has been created! The operating system can now access your USB Pen Drive just like any ordinary Hard Disk Drive.

Copy across all the files you want to the 'new' drive, wait for the Read/Write LED on the USB Pen Drive to stop flashing then disconnect it. That's it. Your files are now safely stored on your USB Pen Drive. If you want to copy those files to another PC/Mac, just plug it in the new machine, wait for it to be detected and copy them off again.

* If you don't want to reach round to the back of your PC every time to plug it in, you can use the handy Docking Bay to give you USB Pen Drive access right from your desktop.

What's USB?

For a good few years now, most Motherboards have been built with an on-board facility called USB.

USB - Universal Serial Bus, is a 'standard' developed by the computer industry to allow a vast number of different devices to be easily attached to one machine with the minimum requirement for extra drivers and software and still operate at an efficient speed.

Put simply, this means: We can plug a USB device in without switching the PC off, it will be automatically detected by the Operating System and will be ready for use in a few seconds. The USB Pen Drive is one of those devices.

Summary

This is file transfer/storage in its safest and most convenient form.

The USB Pen Drive is shock-proof, dust-proof and weighing a mere 21 grams, it needs no batteries, has no moving parts and is available in range of capacities from 32MB to a massive 1GB!

It's supported by Windows ME/2000/XP, Mac OS (ver. 8.6 or above) and Linux kernel (version 2.4.0 or above) without drivers, Windows 98/Windows 95 OSR2 (with supplied USB Driver).

Read full story

Saturday, December 27, 2008

10 Cool Firefox Extensions

0 comments
There are hundreds of Firefox Extensions on the web. Here are some cool Firefox Extensions which make your browsing, downloading and navigation in Firefox as easy as possible, while harnessing the full power and features of Firefox.

Fasterfox - Speed up Firefox. Dynamic speed increases can be obtained with Fasterfox’s unique prefetching mechanism, which recycles idle bandwidth by silently loading and caching all of the links on the page you are browsing. Also tweaks many network and rendering settings.

FlashGot - Handles single and massive downloads with several external Download Managers.

Linky - Lets you open or download all or selected links, image links and even web addresses found in the text in separate or different tabs or windows.

GreaseMonkey - Install user scripts and change the behavior of any web page

All-in-One Gestures - Merges the popular following extensions for management of mouse gestures, scrolling and power navigation. (Mix of Mouse Gestures, Rocker navigation, Tab scroller, History scroller, Link tooltip and Autoscrolling extensions)

Adblock Plus - Is an enhanced version of Adblock. Block ads, applets, flash, embedded-media etc.

SwitchProxy - Lets you manage and switch between multiple proxy configurations quickly and easily. You can also use it as an anonymizer to protect your computer from prying eyes.

FoxyTunes - Listen to music while surfing the Web, and control your favorite media player without ever leaving the browser.

Gmail Manager - Allows you to manage multiple Gmail accounts and receive new mail notifications. Displays your account details including unread messages, saved drafts, spam messages, labels with new mail, space used, and new mail snippets.

gTranslate - Translate any text in a webpage just by selecting and right-clicking over it. Uses the Google translation services.
Read full story

Thursday, December 25, 2008

codes for some samsung mobile phones.

2 comments
1.
code: *2767*JAVA# -this code provides a Java Reset.
2.
code: *2767*MEDIA# -this code will delete All Sounds and Pics and other media on the phone.

1.
code: *2767*WAP# Wap -this code will erase or delete any wap settings from your samsung phone.
2.
code: *2767*CUST# -this code will Reset EEPR0M memory chip of your samsung phone.
3.
code: *2767*FULL# -this code will completely earse all the contents of EEPR0M.
4.
code: *#06# -this code is same as in nokia for IMEI code
5.
code: *#9998*4357# -to open the Help Menu
6.
code: *#9998*5282# -Java menu for gprs and csd setings.
7.
code: *#9999#0# -to enable Monitor Mode
8.
code: *#9999# or *#9998*9999# -to know Software Version of the phone
9.
code: *#8888# or *#9998*8888# -to know the Hardware Version of the phone like manufacture date etc.
Read full story

Wednesday, December 24, 2008

The Back Button Hack In Firefox To Reduce Memory Usage

0 comments

Sometimes Firefox becomes quite slow because it uses caching to increase the speed of browsing while you click the back button. This actually results in using more memory. You can disable this feature by doing the following:

1. Start Firefox and type about:config and hit enter.
2. In the Filter column enter “browser.sessionhistory.max_total_viewers” and instead of the -1 setting, change it to 0 and hit Enter.
3. Restart your browser, now as soon as you start go to a particular site and then just check the Firefox memory usage

, you’ll see the difference.

Enjoy a faster Firefox experience

Read full story

Monday, December 22, 2008

How to remove Virus from USB Drives

0 comments

One of the ways by which a virus can infect your PC is through USB/Pen drives. Common viruses such as ’Ravmon’ , ‘New Folder.exe’, ‘Orkut is banned’ etc are spreading through USB drives. Most anti virus programs are unable to detect them and even if they do, in most cases they are unable to delete the file, only quarantine it. Here are the things which you can do if you want to remove such viruses from your USB Drive

Whenever you plug a USB drive in your system, a window will appear similar to the one shown below

USB

Don’t click on Ok , just choose ‘Cancel’. Open the Command Prompt by typing ‘cmd‘ in the run box. In the command prompt type the drive letter: and press enter . Now type dir /w/a and press enter.

This will display a list of the files in the pen drive. Check whether the following files are there or not

  • Autorun.inf
  • Ravmon.exe
  • New Folder.exe
  • svchost.exe
  • Heap41a
  • or any other exe file which may be suspicious.

If any of the above files are there, then probably the USB drive is infected. In command prompt type attrib -r -a -s -h *.* and press enter. This will remove the Read Only, Archive, System and hidden file attribute from all the files. Now just delete the files using the command del filename. example del Ravmon.exe. Delete all the files that are suspicious. To be on a safer side, just scan the USB drive with an anti virus program to check whether it is free of virus or not. Now remove the drive and plug it again. In most of the cases, the real culprit turns out to be the “Autorun.inf” file which mostly gets executed when someone clicks Ok in the dialog window which appears above. Thus the infections can spread

Security Tip

Disable the Autoplay feature of USB drives. If you disable the Autoplay feature of USB drives, then there are lesser chances of the virus spreading. A tool which can perform such a function is Tweak UI. Download it from here install it.

Tweak UI

Run the program. Now you can disable the Autoplay feature of the removable drives as shown above. By following the above steps, you can keep your USB drives clean.

Tips By- http://www.tricksystem.com
Read full story

Saturday, December 20, 2008

Some codes and tips & tricks for motorola cdma mobiles.

0 comments

Motorola 7760, 7860, 2260, 8160, etc

Nam Programming:

Nam Set: Fcn,0000000000000, Rcl

Nam Set: 74663#, Fcn, Fcn

Test Mode: Fcn, 00**83786633, Sto

Motorola v60c, v120c etc Nam Programming:

Nam Set: 74663#, Menu, Menu, Spc

Nam Set: Menu, 073887, * (type quickly)

Test Mode: Menu, 073887*, Spc

Debug Mode: ##33284

Force the phone into DIGITAL ONLY mode:

1) ##33284 (Debug)

2) RIGHT Softkey (Next) Twice

3) Down arrow 10 times to “PrefMod”

4) RIGHT Softkey (Change) until you see “DigOnly”

5) LEFT softkey (Exit)

6) MENU then LEFT Softkey return to idle screen

7) ##33284 (The last 4 will not display if you have done it correctly)

Motorola t182, c210, etc Nam Programming:

Nam Set: ##1111 end

Nam Set: ##298645665 end

Short Nam: ##073887 sto

Motorola v710, v730, v740, ms150, etc Nam Programming:

Nam Set: 8378*# + press 3 times NATE (spc - 071082)

Test Mode: Menu, 073887*, Spc

Service Menu: #758353266#646#

Motorola StarTac 2004 Nam Programming:

Nam Set: 5759789*#, rec key (3)times (spc - 915037)

Motorola ms200, ms230, etc Nam Programming:

Nam Set: 5759789*# (spc - 915037)

Motorola v6060 Nam Programming:

Nam Set:147*369#456*0#

MOTOROLA TEST MODE:

v60, c120, c331, etc:

1) Turn on the phone. Press MENU 0 7 3 8 8 7 *

2) The phone will require you to “Enter a Security Code”, press 000000, OK

3) Scroll down to “Test mode” choose SELECT. Scroll down to “Enable”

choose SELECT. Your phone is now in test mode.

4) Signal strength is the 3_rd number down on the left hand side of the screen.

5) To toggle between regular mode and test mode: Press MODE then

quickly press the BUTTON DIRECTLY TO THE LEFT OF MENU.

6) To turn off the test mode the phone must be in regular mode, then follow

the above sequence and scroll down to where it says “DISABLE” instead of

“ENABLE” and choose select.

Read full story

Thursday, December 18, 2008

Set Multiple Home Pages In Firefox

0 comments

Did you people ever wish to set-up multiple home pages in Firefox ?

I yes, then you are at the right place. So here’s the way to do this little but useful little trick.

Suppose you would like to set Orkut, Google and my blog :) as your homepages. Then try this tweak in Firefox to set multiple homepages. This is what you should do :

  • Goto Tools>Options>Main
  • In the When Firefox starts drop down menu choose Show my home page
  • In Home page give your homepages separated by a | (pipe symbol)

Multiple Home Pages In FF

Example:http://www.google.com|http://www.orkut.com|http://systemboss.blogspot.com/

  • Click OK
Now next time when you start Firefox all of your three home pages will be displayed simultaneously.

Tips BY - http://www.tricksystem.com
Read full story

Tuesday, December 16, 2008

Nokia Tips and Tricks

0 comments
To check the IMEI (International Mobile Equipment Identity) Type-

*#06#

Information you get from the IMEI-

XXXXXX XX XXXXXX X

TAC FAC SNR SP

*

TAC = Type approval code
*

FAC = Final assembly code
*

SNR = Serial number
*

SP = Spare

To check the phones Software revision type-

*#0000#

Information you get from the Software revision-

V 05.31

18-02-99

NSE-3

*

1ST Line = Software revision
*

2ND Line = The date of the software release
*

3RD Line = Phone type

To enter the service menu type-

*#92702689# (*#WAR0ANTY#)

*

Serial number (IMEI)
*

Production date (MM/YY)
*

Purchase date (MM/YY) You can only enter the date once.
*

Date of last repair (0000=No repair)
*

Transfer user data to another Nokia phone via Infra-Red

Clock Stopping

To check weather your SIM Card supports clock stopping type-

*#746025625# (*#SIM0CLOCK#)

Revealing the Headphone and Car-Kit menus

Please note that if you do these next tricks, the new menus can't be erased without retoring the factory default settings. To do these tricks you need to short-circuit the pins on the bottom of the phone next to where you plug in you charger.

1. To activate the "Headset" menu, you need to short-circuit pins "3" and "4". After a short time the word "Headset" will be shown in the display. Menu 3-6 is now enabled.

2. To activate the "Car" menu, you need to short-circuit pins "4" and "5". After a short time the word "Car" will be shown in the display. Menu 3-7 is now enabled.

THE REBOOT TRICK

This should work on all software versions of the 6110.

1. Go to the Calendar (Menu-8)

2. Make a note or reminder.

3. Enter some text into the edit box.

4. Hold "Clear" until the whole text is cleared, then press "Back".

5. Press "0". The main screen will now be showing but a space appears on the screen. (you can't see it)

6. Enter 4 digits (e.g. 1234).

7. Use the down arrow to move the cursor to the left side of the numbers and the space (Down arrow twice).

8. Now enter 6 digits and press the call button.

Wait for a few seconds, the screen should start to flash and reboots. It should alsowork on other menus like the "Profiles" menu.

EFR CALL QUALITY

To activate EFR (Enhanced Full Rate) Enter the code-

*3370#

This improves call quality but decreases batterylife by about 5%

To deactivate it, Enter the code-

#3370#

THE JAMES BOND TRICK

If you short-circuit theleft middle and right pins on the bottom of the phone with all connections touching each other, the Nokia software hangs! The profile "Headset" will be activated. Before you do this just activate the "Automatic Answer" in the headset profile and set the ringing volume to "Mute". Now you can use your

NETWORK MONITOR

There is a hidden menu inside your Nokia phone. If you want to activate it, you'll have to re-program some chips inside of your phone.
Check your software version. You can only continue if you have v4.33, v4.73 or v5.24.
Take apart the phone.
De-solder the EEPROM (ATMEL AT 24C64).
Read out the data with an EEPROM programmer and save it to a file (Backup).
If you have v.33 or v4.73, change the address "03B8" from "00" to "FF".
If you have v5.24 then change the address "0378" from "00" to "FF".
Write the new data to the EEPROM and solder it back to the phone,
Power on your phone and you should have "Netmonitor" enabled.
The Network Monitor gives you the following information.
Carrier number
MS RX Level in DBM
Received signal quality
MS TX power level
C1 (Path loss criterion, used for cell selection and reselection). The range is -99 to 99.
RTL (Radio link timeout).
Timeslot
Indication of the transmitter status
Information on the Network parameters.
TMSI (Temporary Mobile Subscriber Identity).
Cell identification (Cell ID, Number of cells being used).
MCC (Mobile country code)
MCN (Mobile network code)
LAC (Location area code)
Ciphering (On/Off)
Hopping (On/Off)
DTX (On/Off)
Discard cell barred information

CHECK SIM-LOCK

Note - If you bought your Nokia on UK Vodafone or UK Cellnet you do not need to check this because they both transmit on GSM900, and they don't lock the phones. However if you bought your phone on UK Orange or UK One2one your phone may be blocked. The reason is that they both transmitt on GSM1800. To make a call on GSM1800 you need what is known as a "Dual band" phone. A dual band phone is able to transmit on both GSM900 and GSM1800, so they lock the phones so you can't use it with any other network simcard. If you find that your phone is locked you can try different software to unlock it. (we havn't found one that works yet), or you can ask your service provider who will gladly exchange the 10 digit code for about £35.
This is how to check the status of the 4 different locks. Aslo don't try entering the wrong number, because after 3 times it will block the phone for good.
There are 4 different locks on your Nokia phone.
COUNTRY-LOCK
NETWORK-LOCK
PROVIDER-LOCK
SIMCARD-LOCK
The code to read out the sim-lock status of your phone is
#PW+(MASTERCODE)+(Y)#
# = DOUBLE-CROSS
W = PRESS "*" THREE TIMES
P = PRESS "*" FOUR TIMES
+ = PRESS "*" TWO TIMES
MASTERCODE = 1234567890
Y = NUMBER 1 TO 4
The master code is a secret code. The code has 10 digits, To read out the sim-lock status you can enter every combination you want!
"Y" Shows the status of the network-lock. Here you can enter a number from "1" to "4". The "4" is for the sim-card lock.

SIM-LOCK CHECKS

#PW+1234567890+1# = GIVES PROVIDER-LOCK STATUS
#PW+1234567890+2# = GIVES NETWORK-LOCK STATUS
#PW+1234567890+3# = GIVES COUNTRY-LOCK STATUS
#PW+1234567890+4# = GIVES SIM-CARD-LOCK STATUS.
Read full story

Sunday, December 14, 2008

Make your Internet Speed 20% Faster

12 comments
This only works on Win XP Pro. It really works. I've been using it for years, some time it goes over 20% faster


Read full story

Friday, December 12, 2008

How to format a pc with Windows XP

0 comments


1.Put the CD i mean (your operating system installation CD) (Windows XP or 2000) into your CD-Rom drive.
2.Restart your computer.
3.press F2 ( for get to the boot priority screen.)
4.Use the arrow keys to move to the “Boot” tab.
5.Set first boot device to the CD-Rom drive with the Windows XP or 2000 CD
6.Save
7.Press F10 for Exit
8.Press any key to boot from the CD (quickly). Wait for a while (for loading.....)

9.Your computer should automatically boot from the CD.
10.Press ENTER to setup Windows.( Main Menu )
11.Press F8 to accept the Windows XP Licensing Agreement.Continue installing…
12.Use the ARROW keys to select the partition ( partition or unpartitioned space )

13.Press “D” to delete the main partition or an existing partition ( Where you want to create a new partition. )
14.Or press C to create a new partition.( Type the size (MB-megabytes)

15.Then press ENTER. ( Yes to set up Windows XP on new partition )
Wait while it formats the hard drive.( May be takes about 30 min. depend in CD and PC ).
Windows installation process should start automatically.........
Read full story

Wednesday, December 10, 2008

10 things you don't know about NOKIA

0 comments
1) The ringtone "Nokia tune" is actually based on a 19th century guitar work named "Gran Vals" by Spanish musician Francisco Tárrega. The Nokia Tune was originally named "Grande Valse" on Nokia phones but was changed to "Nokia Tune" around 1998 when it became so well known that people referred to it as the "Nokia Tune."

2) The world's first commercial GSM call was made in 1991 in Helsinki over a Nokia-supplied network, by Prime Minister of Finland Harri Holkeri, using a Nokia phone.

3) Nokia is currently the world's largest digital camera manufacturer, as the sales of its camera-equipped mobile phones have exceeded those of any conventional camera manufacturer.

4) The "Special" tone available to users of Nokia phones when receiving SMS (text messages) is actually Morse code for "SMS". Similarly, the "Ascending" SMS tone is Morse code for "Connecting People," Nokia's slogan. The "Standard" SMS tone is Morse code for "M" (Message).

5) The Nokia corporate font (typeface) is the AgfaMonotype Nokia Sans font, originally designed by Eric Spiekermann. Its mobile phone User's Guides Nokia mostly used the Agfa Rotis Sans font.

6) In Asia, the digit 4 never appears in any Nokia handset model number, because 4 is considered unlucky in many parts of Southeast/East Asia.

7) Nokia was listed as the 20th most admirable company worldwide in Fortune's list of 2006 (1st in network communications, 4th non-US company).

8. Unlike other modern day handsets, Nokia phones do not automatically start the call timer when the call is connected, but start it when the call is initiated. (Except for Series 60 based handsets like the Nokia 6600)

9) Nokia is sometimes called aikon (Nokia backwards) by non-Nokia mobile phone users and by mobile software developers, because "aikon" is used in various SDK software packages, including Nokia's own Symbian S60 SDK.

10) The name of the town of Nokia originated from the river which flowed through the town. The river itself, Nokianvirta, was named after the old Finnish word originally meaning sable, later pine marten. A species of this small, black-furred predatory animal was once found in the region, but it is now extinct.
Read full story

Monday, December 8, 2008

10 Tips For Google Image Search

0 comments
Google Image Search could be used in many ways.

1. If you want to know if a person is a man or a woman and the name doesn't help, do a search for the name.

2. If you don't know the meaning of a word, the pictures may help you.

3. A better search for Flickr. Google uses information from other sites that link to Flickr photos, so you may find Google search better.

4. Find what's interesting about a site, by looking at the pictures included. For example: wired.com.

5. Find a new wallpaper for your desktop by restricting your search to large images. You can automate this using an application.

6. Find random personal pictures, using standard file names from digital cameras.

7. Type the name of a painter and you can take an art class.

8. Install a Greasemonkey script so you can view the original version of the image directly by clicking on the thumbnail.

9. Find the color of a word. "Word Color is a windows program that uses Google Image Search to determine the color of a word or string of words. It goes out there, retrieves the top 9 images and loops through all pixels, calculating the average hue, which is later converted to a color."

10. If you want to grab search results, GoogleGrab is a tool that downloads images from Google Image Search. It even supports batch search.
Read full story

Saturday, December 6, 2008

Create a Shortcut to Lock Your Computer

0 comments

Leaving your computer in a hurry but you don't want to log off? You can double-click a shortcut on your desktop to quickly lock the keyboard and display without using CTRL+ALT+DEL or a screensaver.

To create a shortcut on your desktop to lock your computer:
1.Right-click the desktop.
2.Point to New, and then click Shortcut.
3.The Create Shortcut Wizard opens. In the text box, type the following:
rundll32.exe user32.dll,LockWorkStation
4.Click Next.
5.Enter a name for the shortcut. You can call it "Lock Workstation" or choose any name you like.
6.Click Finish.
Read full story

Friday, December 5, 2008

A-Z Mobile Phone Secrets & Tricks

4 comments
Nokia Universal Codes
Code Description :
These Nokia codes will work on most Nokia Mobile Phones

(1) *3370# Activate Enhanced Full Rate Codec (EFR) - Your phone uses the best sound quality but talk time is

reduced my approx. 5%

(2) #3370# Deactivate Enhanced Full Rate Codec (EFR) OR *3370#

(3) *#4720# Activate Half Rate Codec - Your phone uses a lower quality sound but you should gain approx 30%

more Talk Time.

(4) *#4720# Deactivate Half Rate Codec.

(5) *#0000# Displays your phones software version, 1st Line : Software Version, 2nd Line : Software Release

Date, 3rd Line : Compression Type.

(6) *#9999# Phones software version if *#0000# does not work.

(7) *#06# For checking the International Mobile Equipment Identity (IMEI Number).

(8) #pw+1234567890+1# Provider Lock Status. (use the "*" button to obtain the "p,w"
and "+" symbols).

(9) #pw+1234567890+2# Network Lock Status. (use the "*" button to obtain the "p,w"
and "+" symbols).

(10) #pw+1234567890+3# Country Lock Status. (use the "*" button to obtain the "p,w"
and "+" symbols).

(11) #pw+1234567890+4# SIM Card Lock Status. (use the "*" button to obtain the "p,w" Go to Top
and "+" symbols).

(12) *#147# (vodafone) this lets you know who called you last.

(13) *#1471# Last call (Only vodofone).

(14) *#21# Allows you to check the number that "All Calls" are diverted to

(15) *#2640# Displays security code in use.

(16) *#30# Lets you see the private number.

(17) *#43# Allows you to check the "Call Waiting" status of your phone.

(18) *#61# Allows you to check the number that "On No Reply" calls are diverted to.

(19) *#62# Allows you to check the number that "Divert If Unreachable (no service)" calls
are diverted to.

(20) *#67# Allows you to check the number that "On Busy Calls" are diverted to.

(21) *#67705646# Removes operator logo on 3310 & 3330.

(22) *#73# Reset phone timers and game scores.

(23) *#746025625# Displays the SIM Clock status, if your phone supports this power saving feature "SIM Clock Stop

Allowed", it means you will get the best standby time possible.

(24) *#7760# Manufactures code.

(25) *#7780# Restore factory settings.

(26) *#8110# Software version for the nokia 8110.

Go to Top

(27) *#92702689# Displays - 1.Serial Number, 2.Date Made, 3.Purchase Date, 4.Date of last repair (0000 for no

repairs), 5.Transfer User Data. To exit this mode you need to switch your phone off then on again. ( Favourite )

(28) *#94870345123456789# Deactivate the PWM-Mem.

(29) **21*number# Turn on "All Calls" diverting to the phone number entered.

(30) **61*number# Turn on "No Reply" diverting to the phone number entered.

(31) **67*number# Turn on "On Busy" diverting to the phone number entered.

(32) 12345 This is the default security code.

press and hold # Lets you switch between lines

NOKIA5110/5120/5130/5190

Go to Top
IMEI number: * # 0 6 #
Software version: * # 0 0 0 0 #
Simlock info: * # 9 2 7 0 2 6 8 9 #
Enhanced Full Rate: * 3 3 7 0 # [ # 3 3 7 0 # off]
Half Rate: * 4 7 2 0 #
Provider lock status: #pw+1234567890+1
Network lock status #pw+1234567890+2
Provider lock status: #pw+1234567890+3
SimCard lock status: #pw+1234567890+4
NOKIA 6110/6120/6130/6150/6190
IMEI number: * # 0 6 #
Software version: * # 0 0 0 0 #
Simlock info: * # 9 2 7 0 2 6 8 9 #
Enhanced Full Rate: * 3 3 7 0 # [ # 3 3 7 0 # off]
Half Rate: * 4 7 2 0 #

NOKIA3110

Go to Top
IMEI number: * # 0 6 #
Software version: * # 0 0 0 0 # or * # 9 9 9 9 # or * # 3 1 1 0 #
Simlock info: * # 9 2 7 0 2 6 8 9 #
NOKIA 3330
*#06#
This will show your warranty details *#92702689#
*3370#
Basically increases the quality of calling sound, but decreases battery length.
#3370#
Deactivates the above
*#0000#
Shows your software version
*#746025625#This shows if your phone will allow sim clock stoppage
*4370#
Half Rate Codec activation. It will automatically restart
#4370#
Half Rate Codec deactivation. It will automatically restart
Restore Factory Settings
To do this simply use this code *#7780#
Manufacturer Info
Date of Manufacturing *#3283#
*3001#12345# (TDMA phones only)

This will put your phone into programming mode, and you'll be presented with the programming menu.
2) Select "NAM1"
3) Select "PSID/RSID"
4) Select "P/RSID 1"
Note: Any of the P/RSIDs will work
5) Select "System Type" and set it to Private
6) Select "PSID/RSID" and set it to 1
7) Select "Connected System ID"
Note: Enter your System ID for Cantel, which is 16401 or 16423. If you don't know yours,
ask your local dealer for it.
8) Select "Alpha Tag"
9) Enter a new tag, then press OK
10) Select "Operator Code (SOC)" and set it to 2050
11) Select "Country Code" and set it to 302 for Canada, and 310 for the US.
12) Power down the phone and power it back on again
ISDN Code
To check the ISDN number on your Nokia use this code *#92772689#

Ericsson Go to Top
Ericson T65

*#05# Fake Insert puk screen Press no to exit

Ericsson T20
MENU tecnichal Info
[type] >*<<*<*

Displays :
1] Info service
1] Info SW
2] Info hardware
3] SIMlock
4]setup


2] Service setup
1] Contrast

3]Service Test
1] Display
2]Leds
3]Keyboard
4] ringer
5] Vibration
6]Headset
7] Microphone
8]Clock
4] Names List

MENU info
[Type] >*<<**<
Network and Subnetwork : NCK and NSCK

Ericsson T28

Go to Top
>*<<*<* menu Tecnichal info
SW vers. and name list
>*<<**< menu Personal Info
Network and Subnetwork : NCK and NSCK
<> are the right and left menu's keys
Ericsson T18s/T10/A1018s
>*<<*<* software
CXC125065 Internal product code
PRG
970715 1515 Software version and SW rev.
<* CLR <><**
>*<<*<*> Displays texts and messages in the phone
It will be displayed " TEXT " then push YES
<> are the right and left menu's keys
!!!><**
Control /Enable SIM Lock!!!
Ericsson R310

Go to Top

Technical Info : >*<<*<*
Options :
1) service Info
info Software
Simlock
Configuration

2) Service Test
Display
Led/Illumination
Keyboard
ringer
Vibration
Headset
Microphone
Clock

3)Text's name List
Info personal : >*<<**<

SIM Locking ( 8 digits' code ) ( it could harm your phone )
1) Network
2) Subnetwork
3) SP
4) Corporate

Siemens

Siemens C25

Go to Top
IMEI number: * # 0 6 #
Software version: put off sim card and enter: : * # 0 6 # and press LONG KEY
Bonus screen: in phone booke: + 1 2 0 2 2 2 4 3 1 2 1

Bosch

IMEI Number: * # 0 6 #
Dafault Language: * # 0 0 0 0 #
Net Monitor: * # 3 2 6 2 2 5 5 * 8 3 7 8 #

Alcatel

IMEI number: * # 0 6 #
Software version: * # 0 6 #
Net Monitor: 0 0 0 0 0 0 *

Samsung

Samsung SGH600/2100DB

Go to Top
IMEI number: * # 0 6 #
Software version: * # 9 9 9 9 # albo * # 0 8 3 7 #
Net Monitor: * # 0 3 2 4 #
Chaning LCD contrast: * # 0 5 2 3 #
Memory info: * # 0 3 7 7 # albo * # 0 2 4 6 #
Reset pamieci (SIMLOCK`a removing!!!): *2767*3855#
Reset pamieci CUSTOM: *2767*2878#
Battery state: * # 9 9 9 8 * 2 2 8 #
Alarm beeper: *#9998*289#
Vibra test: *#9998*842#
.:: Dancall ::.
IMEI number: * # 0 6 #
Software version: * # 9 9 9 9 #

Philips

*#3333*# Displays the blocking list.
*#7489*# Displays the security code.
*#06# Displays the IMEI number.
*#8377*# Displays the SW info.

Panasonic

Panasonic gd90 gd93

Go to Top
*#9999# SW - Type the code on switch on , during network seek
-Vers. SW and production code
Enable ringing and vibration contemporarily
Enable vibration with # then increase volume with "tone menu "
Panasonic gd70
*#9999# SW - Type the code on switch on , during network seek
-Vers. SW and production code
Enable ringing and vibration contemporarily
Enable vibration with # then increase volume with "tone menu "

Acer

Acer V 750

*#400# Display Adc/ Set Cal-Value -
*#402# Set LCD Contrast
*#403# Display Errors Info
*#300# Display Info Hw & Sw
*#301# Menu Test
*#302# Menu Acoustics
*#303# (Settings saved) Set English language?
*#307# Menu Engineering
*#311# Reset Phone Code - [ Also reset Security Codes ! ]
*#330# (Execute not success) [ unknown ]
*#331# (Service deactivated) [ unknown ]
*#332# (Service unavailable)[ unknown ]
*#333# (Execute not success)[ unknown ]
*#351# (Service unavailable) [ unknown ]
*#360# (Invalid input)[ unknown ]
*#361# (Invalid input) [ unknown ]
*#362# (Invalid input) [ unknown ]
*#363# (Invalid input) [ unknown ]

Genie
Genie DB

Go to Top

*#06# IMEI.
*#2254*# Near Cell Mode.

For every received BTS will be displayed :
Current channel and 2 channel levels

*#06# IMEI
*#2558# time of network connection ( D/H/M )
*#2562# Fores reconnection to network
!!!*#7489# Dispalys and modify phones' security code!!!
!!!*#3377# SIM lock information !!!
*#7378# SIM card Informations : supported phase name and tipe
*#7693# Enable/disable "Sleep Mode"
*#8463# State of "Sleep Mode"
*#2255# Debug Call Mode enable/disable
*#3333*# Displays the blocking list.
*#7489*# Displays the security code
*#06# Displays the IMEI number
*#8377*# Displays the SW info.

NEC

NEC db2000

Go to Top
*#2820# software vers.
IMEI *#06#
Reset *73738# (send?)
SP Lock info:
* # 3210 # (send?)
Network barring info : *#8140# (send?)
( it could harm your phone )
SIM lock it could harm your phone )
*#4960 # (send?) -Inquiry * 4960 * password * password # (send?) lock
#4960* password # (send?) unlock
[password] [8 digits]
Net Lock
*#7320# (send?) -Inquiry * 7320 * password * password # (send?) lock
#7320* password # (send?) unlock
[password] [ 8 digits]
Net Lock 2:
*#2220# (invio) - Inquiry * 2220 * password * password # (send?) lock
#2220* password # (invio?)unlock
[password] [8 digits]
Unlock subnetwork
*#1110# (send?) - inquiry * 1110 * password * password # (send?) lock
#1110* password # (send?) unlock
[password] [n? 8 cifre]
( it could harm your phone )
.:: Trium ::.

Trium Geo/Geo @ - Astral - Cosmo -Aria

Enter the menu and type *
A new menu will be displayed :
Application : SW version and battery's voltage


Trium Galaxy
Push * and type 5806: Production date and SW version

Telit
Telit GM 810

Go to Top
MONITOR - technical menu - : type ++++ and push OK.
Adiacent cells list : # and *
Now if you push OK the phone displays battery ' s voltage and temperature
.:: Sagem ::.
Sagem MC959/940
Select commands' menu and push *
Displays a new menu' :
Appli : software vers. and battery's voltage
Eprom
Sim Lock
Test LCD: display test , green/red and vibration
Sagem MC920

Select commands' menu and push *
Displays 5 new menus :

1 APPLI
VERSION ( SW)
BATTERY (voltage )
2 PROM (IMEI)
3!!! SIM LOCK (10 digits code requested ) !!!
4- NETWORK (returns : OPTION NOT AVAILABLE)
5- TEST LCD
SYMBOL 1 (LCD)
SYMBOL 2 (test2 LCD)
BLACK (all icons and carachters displayed )
FOR PHOTO (welcome message and time )
VIBRATOR (vibration test )

Sony

Sony CMD Z5/J5

Go to Top
Vers. SW :
Without SIM , switch on phone and type l *#7353273#

Eprom

!!! Sim Lock [10 digits code ] ( it could harm your phone )
NETWORK : OPTION NOT AVAILABLE
Test LCD: display test of the green/red leds and vibration
Push * and type 4329 :enables/disables network monitor 1 (the same of MT35)
Push * and type 621342 :enables/disables network monitor 2
Push * and type 5807 : Serial Number Software Vers.
Push * and type 936505: IMEI -- Software Vers.
TPush * and type 547 : Test serial Data Cable DISPLAYS :"Testmode"
Push * and type 362628: ISMI BLOCK (UNKNOWN)
Push * and type 476989: NS BLOCK (UNKNOWN)
Push * and type 482896:CP BLOCK (UNKNOWN)
Push * and type 787090: ? BLOCK (UNKNOWN)
Push * and type 787292 : block current network
!!! Push * and type 967678: SP LOCK!!!
Push * and type 850696:Warm Start ( ENABLE/DISABLE)
Push * and type 3926 : Swicth off phone
Push * and type 5806: Production date and SW version

Motorola V3688

Go to Top
IMEI *#06#
Enhanced Full Rate Codec EFR
Enable EFR : [][][] 119 [] 1 [] OK.
disable EFR : [][][] 119 [] 0 [] OK
.:: Tips and Tricks ::.
Send an E-mail from your GSM

From your telephone you can send an email to whichever E-mail customer of the Internet network.

The e-mail will be sent to the maximum of within an hour from the reception.

The sended message will contain in luminosity the telephone number of the sender.

In order for sending e-mail, send an SMS with this syntax (always separated by spaces):

EMA name@domain text-of-your-email

Example: in order to send an email to john@doe.com, do the following:

EMA john@doe.com text-of-your-email

if your phone cant print @ replace it with a !

EMA johon!doe.com text-of-your-email

And then send this message to the folloving number: +39 338 8641732
Free SMS Center numbers

Go to Top


From your telephone you can send SMS messages of 160 char. max. to another GSM phone

Your message will be sent through an SMS Center (usually the one that gave your provider)

You pay a little fee depending of your provider, BUT YOU WILL HAVE TO PAY something

In order for sending SMS without paying anything, you got to change your SMS Center number with these one

+491722270300 or +358405202999 or +352021100003
Codes (that they dont tell you in the manual)

To check the IMEI (International Mobile Equipment Identity) type: *#06#

Information you get from the IMEI:
XXXXXX XX XXXXXX X
TAC FAC SNR SP

TAC = Type Approval Code (first 2 digits = country code).

FAC = Final Assembly Code (For Nokia phones FAC=10).

SNR = Serial Number.

SP = Spare (always SP=0).

To check the phone's software (firmware revision information) type: *#0000# ( or for some phones outher then Nokia 61XX you

can try *#model nummber# ex. for 8110 *#8110#)

Information you can get from the phone's software version:
V 3.14
28-11-97
NSE-3

1st line: Software version.
2nd line: The date of the software release.
3nd line: Phone type, .

Some versions and dates:

V 3.14 28/11/97

V4.33 11/03/98

V 4.73 22/04/98

V 5.24 14/9/98
Pin-Out Diagram for the 6110

Go to Top
1 - VIN CHARGER INPUT VOLTAGE 8.4V 0.8A
2 - CHRG CTRL CHARGER CONTROL PWM 32Khz
3 - XMIC MIC INPUT 60mV - 1V
4 - SGND SIGNAL GROUND
5 - XEAR EAR OUTPUT 80mV - 1V
6 - MBUS 9600 B/S
7 - FBUS_RX 9.6 - 230.4 KB/S
8 - FBUS_TX 9.6 - 230.4 KB/S
9 - L_GND CHARGER / LOGIC GND
Revealing Headphone and Car-Kit Menus

Think about this: If you do these tricks the new menus can not be erased after the procedure. But it's not dangerous or

harmful for your phone

To enable the headset-function, you have to short-circuit the "3" and "4". After a short time there is "Headset" on the

display Now, menu 3-6 is now enabled!

To enable the carkit-function you have to short-circuit the "4" and "5". After a short time, "Car" is shown on the display

and the menu 3-7 is enabled!!
This Trick is for you how want to hear more then your supposed to ! Go to Top
If you short-circuit the left and the right contact with the middle contact ("3", "6" and "9") the Nokia Software hangs! The

profile "Headset" will be activated. Before you do this, just active the "auto call receive" function in the headphone

profile and set the ringing volume to "mute" Now you can use your phone for checking out what people are talking about in a

room. Place the phone somewhere stratidic and call your phone! The phone receives the call without ringing and you can listen

to what people are talking about! .....gr8...
Serial numbers on your 6110

For more info type: *#92702689#
The first screen gives you the serial and IMEI number.
Then there is the Date of Manufacture: ex. Made 1297
Then there is the Purchasing Date: ex. Purchasing Date 0298
Then there is the last Repair Date: ex. Repaired: 0000

Note: you must turn off the phone to exit after this test, because of the last function, "transfer user data" which doesn't

work as "standard"....You can use this mode only to transfer all Calender, Profile and Callers Group Information to another

phone (eg. if you are replacing phone or configuring phones for use within your company or when a particular phone doesn't

works correctly )
Activating and deactivating EFR and HFR, on your 6110

*3370# to activate Enhanced Full Rate - Makes calls sound better, but decreases the battery life by about 5%.

#3370# to deactivate Enhanced Full Rate

*4720# to activate Half Rate Mode - Drops call quality, but increases battery life by about 30%.

#4720# to deactivate Half Rate Mode
Read full story

Thursday, December 4, 2008

How do I delete an "undeletable" file

0 comments
1.Open a Command Prompt window and leave it open.

2.Close all open programs.

3.You now need to close EXPLORER.EXE. The proper way to shutdown Explorer is to raise the "Shut Down Windows" dialog (select "Shut Down..." from the start menu), hold down CTRL+SHIFT+ALT and press the CANCEL button. Explorer will exit cleanly.
Note: The at the 'Shut Down Windows' dialog method of closing Explorer is built into Explorer. (It was specifically designed so that developers writing Shell Extensions could get Explorer to release their Shell Extension DLLs while debugging them).

4.Go back to the Command Prompt window and change to the directory where the undeletable file is located in. At the command prompt type DEL where is the file you wish to delete.

5.Go back to Task Manager, click File, New Task and enter EXPLORER.EXE to restart the GUI shell.

6.Close Task Manager.


Windows 95/98/ME

If you are using Windows 95, 98, or Windows ME, the easiest way to remove an undeleteable file is to boot to a DOS prompt and manually delete the file. Before you do this, you'll want to make a note of the location of the file including the entire path to it. Follow the steps below to delete these types of files.
If you already know the path to the file, please skip to Step 7

1. Click on Start, Find, Files and Folders
2. Type the name of the undeletable file in the Named or Search For box
3. Make sure the Look In box shows the correct drive letter
4. Click on Find Now or Search Now and let the computer find the file
5. Once the file is located, right-click on it and choose properties, make a note of the file location. Usually this is something similar to

c:\windows\system32\undeleteablefilesname.exe
6. Close the search box
7. Locate a boot disk for your version of Windows, if you do not have a boot disk, follow the steps on the link below to create an emergency boot disk.

How to Create an Emergency Boot Disk for Windows

8. Shut down and restart your computer with the boot disk in your floppy drive.
9. The computer will boot to a DOS prompt that will look similar to

c:\

10. Type the following command and press Enter to delete the filer, substituting the phrase with the actual path and file name you discovered in Step 5 above.

del

Example:

del c:\windows\undeleteablefile.exe
11. Remove the boot disk in the floppy drive and restart your computer
12. The file should now be deleted.

Windows XP

In Windows XP, there are a couple ways to remove an undeleteable file, a manual way, and a couple automated ways using some freeware programs. First, I'll show you the manual way.

Manual Method

If you already know the path to the file, please skip to Step 7

1. Click on Start, Search, All Files and Folders
2. Type the name of the undeletable file in the box shown
3. Make sure the Look In box shows the correct drive letter
4. Click Search and let the computer find the file
5. Once the file is located, right-click on it and choose properties, make a note of the file location. Usually this is something similar to

c:\windows\system32\undeleteablefilesname.exe

6. Close the search box
7. Click on Start, Run, and type CMD and Press Enter to open a Command Prompt window
8. Leave the Command Prompt window open, but proceed to close all other open programs
9. Click on Start, Run and type TASKMGR.EXE and press Enter to start Task Manager
10. Click on the Processes tab, click on the process named Explorer.exe and click on End Process.
11. Minimize Task Manager but leave it open
12. Go back to the Command Prompt window and change to the directory where the file is located. To do this, use the CD command. You can follow the example below.

Example: to change to the Windows\System32 directory you would enter the following command and Press Enter

cd \windows\system32

13. Now use the DEL command to delete the offending file. Type DEL where is the file you wish to delete.

Example: del undeletable.exe
14. Use ALT-TAB to go back to Task Manager
15. In Task Manager, click File, New Task and enter EXPLORER.EXE to restart the Windows shell.
16. Close Task Manager
Read full story

Wednesday, December 3, 2008

Hiding shared folders with $

0 comments
If you would like to share a folder so that users on your network can access it easily, but are worried about displaying the folder for anyone to browse through, there is an easy way to render a shared folder invisible but still accessible.

From the shared folder dialog: (right click on desired folder\sharing and security\). You can hide a shared folder by simply adding a '$' to the end of the name you give the folder in the 'sharing and security' window. In this way, you can maintain network access to shared folders, while hiding them from prying eyes.

To browse to a hidden shared folder from another computer, simply click 'start/run' then type \\(name of the computer the share is on)\(sharename$) and press enter.
Read full story

Tuesday, December 2, 2008

How to save a wet cell phone

0 comments
How to save a wet cell phone
When a cell phone gets wet, our first instinct is to toss it in the garbage, convinced that it will never work properly again. Before you give in to frustration, consider taking the following steps to help you save a wet cell phone and the expense of purchasing a new one.


1. Get it out of the water as soon as possible.
The plastic covers on cell phones are fairly tight, but water can enter the phone over time. But this time may be quite short - 20 seconds or less. So grab your phone quickly!

2. Remove the battery.
This is one of the most important steps. Don't take time to think about it; electricity and water do not mix. Cutting power to your phone is a crucial first step in saving it. Many circuits inside the phone will survive immersion in water provided they are not attached to a power source when wet.

3. Remove your SIM card.
Some or all of your valuable contacts (along with other data) could be stored on your SIM. To some people this could be more worth saving than the phone itself. SIM cards survive water damage well, but some of the following steps are unnecessary i.e. don't heat it. Just pat it dry and leave it aside until you need to connect your phone to your cellular network. Note that many phones by specific providers, such as Verizon, do not use SIM cards.
4. Dry your phone.
Obviously you need to remove as much of the water as soon as possible, so you can save it from getting into the phone. Use a towel or paper towel to remove as much of the water as possible.

5. Allow the phone to dry. Since you do not want to ruin your phone or lose all of the numbers in your phone book, you need to allow the phone to dry. Also, ringtones and graphics stay with the phone - not the SIM. Don't try putting the battery back on to see if it works as this would risk damaging the phone with a short circuit. Put the phone into a bowl of rice to dry it.

6. Wait. This is the hardest part - leaving your phone alone, with battery and SIM card out, while it dries slowly. Tricks like leaving your phone in a bowl of dry rice or silica gel (like the packets found in shoe boxes) will help to expedite moisture evaporation. They might also have side effects like getting rice in your phone. Just put it someplace reasonably warm and dry, uncovered so water can evaporate, and wait.Apply enough heat to your phone to cause the water to evaporate without waterlogging your digital screen. One of the best things you can do to save a cell phone is to set it on the back of your computer monitor or TV screen over the heat vents. This is usually the perfect amount of heat to fix your phone. The convection action of the heat vents will help carry away the moisture in your phone. Leave the phone on the heat for at least 2-3 days. Another option is to leave it overnight in the oven on warm (make sure to take off the battery first).

7. Test your phone. After you have waited 10 minutes, make sure everything is clean and dry looking and re-attach the battery to the phone and see if it works. If your phone does not work, try plugging it into its charger without the battery, if this works, you need a new battery, if not, wait another few days. If it still won't work, try taking your cell phone to an authorized dealer. Sometimes they can fix it.

TIPS:

1. Don’t put the battery on for at least 3 days or longer if your digital screen is foggy.

2. Place a piece of satin finish scotch tape over your water damage sticker before you drop your cell phone in the water to prevent the water damage sticker from voiding your warranty. This sticker can usually be found under your battery. It’s a small round white sticker, possibly with dots on it. If this sticker gets wet it changes color and your phone is marked for water damage.

3. Remove the tape if you ever have to return your phone for repairs or warranty. (See the note in the ‘Warnings’ section about doing this!)

4. The best way to dry out your phone is to place it in front of an air conditioner or air conditioning vent. Cold air won’t damage your phone (hot air can warp or in extreme cases even melt plastic), and air from an air conditioner is dry, and so will evaporate water faster than you might think (which is why a car air conditioner will de-mist the windshield so effectively, even if the engine hasn’t warmed up yet). Warm air from a reverse-cycle air conditioner works even better, of course. If you dry your phone in this way overnight it should be fine by the morning.

5. Use a hairdryer set on warm; it won’t melt your head so your phone should be safe.

6. Use a food dehydrator.

7. Use the oven on the warm setting (make sure to take out the battery)


WARNINGS:

1. Don’t heat the battery or it could leak acid. If you use an oven or hairdryer, make sure to remove the battery first.

2. If you use alcohol make sure to do so outside, and do not apply heat in any form, not even the gentle heat of a monitor. Do not hook up the bettery till the alcohol smell dissipates.

3. Do not apply heat to your phone other than mentioned above. You don’t want to melt or burn your phone.

4. Warranty fraud is naughty! If you dropped your phone in the can with your other ‘droppings’–are you really going to send it in for a warranty tech to have to open? Yuck!

5. FYI, Most modern phones have more than one liquid damage indicator on them, only one visible to you (and sales/technician agents), and chances are, if the sticker under the battery is triggered (or would be, with the scotch tape trick), then the odds are that the internal stickers you can’t access are tripped as well. This will still result in you paying a voided-warranty fee in the long run, and it may be best to just learn from your mistake (and not make it more financially severe!).

6. Even if all these steps are followed, minerals dissolved in the water can precipitate on solder and component pins, causing corrosion or shorting. Components pins are packed so closely together in a modern cell phone that even a small encrustation can create a short, rendering the phone inoperable.
Read full story

Monday, December 1, 2008

How to share one Internet connection with another computer using Vista?

0 comments

If you have more than one computer at home and have only one internet connection, you might be wondering how to use internet in both the computer. Let’s assume there are two computers A and B. Computer A runs on Windows Vista and Computer B runs on Windows XP.


Computer A is connected to Internet via cable, so this will be connected through a LAN card. Now to connect computer B, you will need another LAN card in computer A or if you want to connect to more than one computer, you will need a wired hub.

First let me explain how to connect two computers in LAN.

Step 1: In Vista, before doing this you should enable Sharing and Discovery. You can do that by going to Control Panel -> Network and Sharing Center. Under the section ‘Sharing and Discovery, enable Network discovery, File Sharing, Public folder sharing and others if you want to. (See picture below)
Here, first network represents connection to internet and second one the local connection with another computer.

Step 2: If your LAN card that is connecting to another computer is installed, it will be shown under Control Panel -> Network Connections.

Step 3: Right click that local area connection and click properties.

Step 4: Under the tab ‘Networking’, click the properties Internet Protocol Version 4 (TCP/IPv4).

Step 5: Click the radio button to ‘Use the following IP’ and give an IP address (For example, IP address: 192.168.0.1 and Subnet Mask: 255.255.255.0)

Step 6: Don’t give any other information, Click Ok and close everything.

Step 7: In computer B, make sure you enable the LAN card which is used to connect to computer ‘A’. Here you need not give any IP information as Computer ‘A’ will assign an IP address dynamically. If it’s not working make sure there are no IP assigned and change the properties to ‘Obtain an IP address automatically’.

Step 8: Test the connection by pinging. (You can do this by typing ping 192.168.0.1 or whichever is Compter ‘A’s IP in the comand prompt)

Sharing the Internet connection of computer ‘A’ with computer ‘B’:

Right click LAN card which is connected to Internet under Control Panel -> Network Connections and click ‘Sharing’ tab and enable both the options to share Internet. (Note: Unless there is another enabled LAN setting you will not be able to see the shared tab under properties)
Click Ok and close. This option is given by the Windows OS known as ICS (Internet Connection Sharing).
Now you can use Internet from both Computer A and Computer B from a single connection.
Read full story

Sunday, November 30, 2008

Replace your Notepad with Advanced NoteTab Text Editor

2 comments
Notepad is a Simple Text Editor that comes along with your Windows Vista or XP OS but what lacks in Notepad is lack of features. Note Tab Light is a Free ware Text Editor with features like Tab Windows where users can Switch between Multiple Tabs. Users can Open Multiple Text Documents and Switch across them with ease.

Note Tab Software is available in Three Different Versions ranging from a Free Light Version, Pro to a Standard Version. The latest Note Tab Version 5.3 is Compatible with Windows Vista Version.

Note Tab allows users to Open an Unlimited number of Tabs on its Interface.Each file runs in its own Tab and switch between the Windows is pretty easy. Note Tab is some Interesting Features where Users can Extract HTML code out of a Document, Paste Board that can be used to save Text Clips Automatically . Users can choose a Document as a Paste Board. Any content that is added to the Clip board will be Automatically appended with the Content in the Paste Board.

Note Tab also has a clip Library where users can access small Drag and Drop scripts starting from a Text, Audio Clips, HTML Tabs and other Scripting Language Codes. The Advanced Version of the Note Tab has features like replacing Content in a File without Opening the File.
Read full story

Saturday, November 29, 2008

How to Save a Laptop from Liquid Damage

0 comments

1. Shut it off! Immediately remove the battery, the A/C adapter, and unplug the device after the spill. The biggest danger at first is the device shorting out.


2. Turn it upside down immediately to stop the liquid from traveling deeper into the machine.

3. Clean up any part of the spill you can get to. Use paper towels or any absorbent material that is lint-free.

4. Inspect the keyboard. Some keyboards are designed to protect the internals from liquids:
* Pour out any liquid contained in a keyboard enclosure.
* Remove and clean an easily removable keyboard.

5. Wipe up anything sticky. This may include the screen, the keys on the keyboard, and any buttons. Use a clean, slightly dampened, lint-free cloth.

6. Disconnect and remove any and all external devices.

7. Insulate yourself from static discharge. Static electricity can be very high voltage. Static discharge from your hands and body can destroy even a dry computer. Learn how to Avoid Destroying a Computer With Electrostatic Discharge.

8.Disassemble the case. If you cannot get to the whole spill, then it may be necessary to remove the laptop's case. Most spills will contain chemicals that can corrode internal circuit boards:
* If you aren't comfortable taking your device apart, then get it to someone who is, as soon as possible.
* Pull the hard drive to protect your data.
* Remove as many cards or drives as you can.

9. Remove dry residue. Use a toothbrush or lint-free cloth to gently remove any dried residue from non-water stains such as cola or coffee. Blow the residue away with compressed air.

10. Rinse off the residue. If you spilled anything besides water on the laptop, rinsing it clean will be the most dramatic part. There are several ways to rinse your machine, depending on the kind of spill, and how much risk you are willing to endure:
* Think about what has been spilled on/in your computer, and determine whether it is water soluble or petro-chemical based. In the case of the former, deionized water will work fine. If it is oily, etc., then rinse with denatured alcohol, and then rinse with deionized water.
* Rinse with water. Take any components that have residue (a fresh spill or an old spill of cola) and rinse them under the tap. Most circuit boards and similar non-moving components handle water well, as long as they are not powered. Some internal components with moving parts may not handle water well, for example, fans and CD/DVD drives.
* Rinse with deionized or distilled water. Many people prefer to rinse with deionized water over tap water. Regular water will leave deposits that can cause electrical shorts, but deionized water will rinse clean, dry, and leave nothing behind.
* Don't get too carried away rinsing your machine. Water and laptops do not mix, either. Rinse as much as you need to, and not more. Carefully blot up excess water, if any.

11.Let it dry. Be completely sure that the parts are dry before you proceed. As with rinsing, there are different theories on drying:
* Dry naturally. Prop the machine up, away from surfaces, so that air can circulate in and around the entire unit. Leave the machine to dry for 24 to 48 hours.
* Dry with light heat. Place your deck on a warm radiator or on top of a warm sill or shelf - out of direct sunlight - or near other source of warmth. Do not use high levels of heat, just moderately warm sources of heat. Let it dry for 12 hours, or so. A nearby dehumidifier may improve drying time.
* Never use a hair dryer, as this will cause static problems and fill your machine with more contaminants and dust. A hair dryer at a high setting could also melt some of the plastic components.

12. Clean with a solvent. A second rinse with a solvent-based cleaner is recommended by some, and abhorred by others.
* If you suspect that your first rinse did not remove all of the residue, a chemical rinse of this kind may be worth the risk. The advantages of such a rinse are: there is only one substance to apply and remove; that substance, typically, evaporates; long drying times are not required. The disadvantage is that, if you use the wrong solvents, you can literally dissolve your computer.
* Buy and use 99% (not 90%) isopropyl alcohol. Never, ever use gasoline or acetone to clean computer parts.
* Using a cotton swab, carefully rub or wipe each component of the board, until it is clean.
* Try flux remover, a spray-on can available in electronics stores, rather than isopropyl alcohol.

13.Put the laptop back together, and test it to see if it is working.
Read full story

Friday, November 28, 2008

TOP 20 PC Tips

0 comments

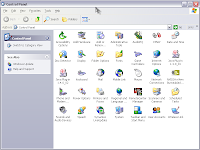
Control Panel on the DESKTOP.

On The Desktop, Right Click Your Mouse Then Choose "New | Folder". Name The Folder As "ControlPanel. {21EC2020-3AEA-1069-A2DD-08002B30309D}" Without The "Quote Things. And Now You Can Access The Control Panel More Faster Then Before.

Changing INTERNET EXPLORER icon Name.
Open Registry Editor Then Go To : "HKEY_CURRENT_USER\Software\Microsoft\Windows\CurrentVersion\Explorer\CLSID". You Can See A Few Key Below It.


Deleting the INDEX.DAT
Del "C:\Documents and Settings\aeon\Local Settings\Temporary Internet Files\Content.IE5\index.dat"


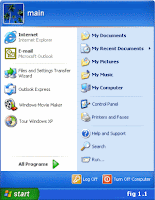
Removing user name in the start menu

Open Registry Editor Then Go To : "HKEY_CURRENT_USER\Software\Microsoft\Windows\CurrentVersion\Policies\Explorer".

On The Right, Make A New Entry With Right Click On Your Mouse Then Choose "New | DWORD Value" Change The Entry's Name Into "NoUserNameInStartMenu", Double Click In The New Entry And Fill The "Value Data" With "1". Press OK, Exit From The Registry Editor. Restart Your Computer.


Internet explorer speed up.

Edit your link to start Internet Explorer to have -nohome after it. For Example: "C:\Program Files\Internet Explorer\IEXPLORE.EXE" -nohome

This will load internet explorer very fast because it does not load a webpage while it is loading. If you want to go to your homepage after it is loaded, just click on the home button.


Speed up web browsing.

Iv'e personally found a dramatic increase in web browsing after clearing the Windows XP DNS cache. To clear it type the following in a command prompt: ipconfig /flushdns.


Easy way to add the ADMINISTRATOR USER to the welcome screen.

Start the Registry Editor Go to:

HKEY_LOCAL_MACHINE \ SOFTWARE \ Microsoft \ Windows NT \ CurrentVersion \ Winlogon \ SpecialAccounts \ UserList \

Right-click an empty space in the right pane and select New > DWORD Value Name the new value Administrator. Double-click this new value, and enter 1 as it's Value data. Close the registry editor and restart.


Drive icon.

To set the icon of any drive (hard disk, cd rom or anything else) with a letter (C:\ etc.), run REGEDIT (Start -> Run -> regedit)
Navigate to:

HKEY_LOCAL_MACHINE\SOFTWARE\Microsoft\Windows\CurrentVersion\Explorer

If one doesn't already exist, create a new KEY called "DriveIcons". Under this key, create a new key with the letter of your drive. I.e. C for your C:\ drive.
To change the icon for that drive, create a key inside that one called DefaultIcon and set the path of (Default) to the location of your icon
eg C\DefaultIcon\ then (Default) = D:\Documents\C Drive Icon.ico

To change the name of that drive, create a key in the drive letter one (eg C\) called DefaultLabel and set the (Default) to what you want the drive to be called. This is useful if you want to assign a long name to the floppy drive.


Locking computers.

To lock a computer in XP, as you probably know, you press "L" while holding down "Windows Logo" key on your keyboard. However, if you would like to lock a computer remotely, for example via "Remote Administrator", you don't have this ability. What you can do instead, is to create a shortcut on remote computer's desktop where Target %windir%\System32\rundll32.exe user32.dll,LockWorkStation Start In %windir%


Administrator in welcome .

When you install Windows XP an Administrator Account is created (you are asked to supply an administrator password), but the "Welcome Screen" does not give you the option to log on as Administrator unless you boot up in Safe Mode.

First you must ensure that the Administrator Account is enabled:

1 open Control Panel
2 open Administrative Tools
3 open Local Security Policy
4 expand Local Policies
5 click on Security Options
6 ensure that Accounts: Administrator account status is enabled Then follow the instructions from the "Win2000 Logon Screen Tweak" ie.

1 open Control Panel
2 open User Accounts
3 click Change the way users log on or log off
4 untick Use the Welcome Screen
5 click Apply Options

You will now be able to log on to Windows XP as Administrator in Normal Mode.


Hidden windows XP icon.

Windows XP Pro and Home contains icons for folders and files that cannot normally be seen, you can select to view hidden files from the folder options menu, but there are still some that remain hidden.

You can set windows to view these files as normal hidden files, so that when you use the view hidden files and folders toggle from the folder options menu that these will be turned on/off along with the normal hidden files.

These files are usually system files and should not be altered/deleted unless you really know what you are doing, if you don't yet still wish to change them I might suggest that you create back-ups of your system first.

I will personally accept no responsibility for any damage caused by using this tweak. To view the hidden files you need to open up regedit, if you are not sure how to do this, select run from the start menu and type in 'regedit' without the apostrophe's. In the regedit window, expand out the groups by clicking on the '+' next to the name in the left hand column of regedit, and navigate to the below address.

HKEY_CURRENT_USER \SOFTWARE \MICROSOFT \WINDOWS \CURRENTVERSION \EXPLORER \ADVANCED

when you have clicked the advanced folder on the left pane, look down the list at the titles in the right hand pane, one of those titles is 'ShowSuperHidden'

double click the title and in the window that appears set the value to equal 1 to show the super hidden files and 0 to hide them.


Auto delete tempopary folder.

First go into gpedit.msc

Next select -> Computer Configuration/Administrative Templates/Windows Components/Terminal Services/Temporary Folder

Then right click "Do Not Delete Temp Folder Upon Exit"

Go to properties and hit disable. Now next time Windows puts a temp file in that folder it will automatically delete it when its done! Note from Forum Admin: Remember, GPEDIT (Group Policy Editor) is only available in XP Pro.


Clear unwanted entries from add/remove programs.

Run the Registry Editor (REGEDIT).

Open HKEY_LOCAL_MACHINE\ SOFTWARE\ Microsoft\ Windows\ CurrentVersion\ Uninstall Remove any unwanted keys under "Uninstall."


CD ROM stops AUTOPLAYING/AUTORUN.

And the AutoPlay Tab has disappeared in My Computer, Devices With Removable Storage, Right Click on CDROM, Properties.

Solution: The service: "Shell Hardware Detection" has been set to Manual or Disabled. Go to Control Panel, Administrative Tools, Services. Return this service to "Automatic".


Shutdown XP faster
Method1
Like previous versions of windows, it takes long time to restart or shutdown windows xp when the "Exit Windows" sound is enabled. to solve this problem you

must disable this useless sound. click start button then go to settings -> control panel -> Sound,Speech and Audio devices -> Sounds and Audio Devices -> Sounds, then under program events and windows menu click on "Exit Windows" sub-menu and highlight it.now from sounds you can select,choose "none" and then click apply and ok. now you can see some improvements when shutting down your system.

Shutdown XP faster.
Method2
Start Regedit.
Navigate to HKEY_LOCAL_MACHINE/SYSTEM/CurrentControlSet/Control.
Click on the "Control" Folder.
Select "WaitToKillServiceTimeout"
Right click on it and select Modify.
Set it a value lower than 2000 (Mine is set to 200).


16 Colours icons.

If you select 16bit mode for graphics your icons will revert to using 8bit (16 color) icons. Yuck! Change the following registry setting to:

[HKEY_CURRENT_USER\Control Panel\Desktop\WindowMetrics] "Shell Icon BPP"="16" "Shell Icon Size"="32" Setting the BPP to 16bit will yield 65565 colors for icons.
Read full story
 

My Blog List

Hello